Glossy badge
This recipe will show you how to use Photoshop to create a nice glossy badge or button suitable for displaying in a web page. The recipe will produce a badge template that can be reused to produce multiple badges.
Table of contents
Create basic badge shape
First, start Photoshop and create an empty canvas (). Make the canvas size 800 × 800 px. Fill it with some background colour (e.g. 20 % grey).
Then add another layer and select another colour (it
does not matter what colour you use, green will be used in this
tutorial) and create a circular shape, width and height should be
roughly half the size of canvas. Hold down the SHIFT to
force it to be circular.
Make a selection of the shape, invert it, and save it under a name (e.g. “Outside badge”) so that it can be loaded later.
Add layer styles
Most of the visual effects that simulate a glossy badge is created by the layer styles added below. The settings shown are just starting points. You may want to experiment with these to fine-tune the badge appearence.
The following layer styles are going to be applied:
- Drop Shadow
- Inner Shadow
- Inner Glow
- Gradient Overlay
- Satin
First, we're going to add a basic drop shadow to the badge. We do this using the Multiply blending option.
 The
Multiply blending option belongs to the darken group. It is named
after the actual math that Photoshop performs behind the scenes when
you have the Multiply mode selected. Photoshop takes the colors from
the layer that's set to the Multiply blend mode and multiplies them by
the colors on the layer(s) below it, then divides them by 255 to give
us the result.
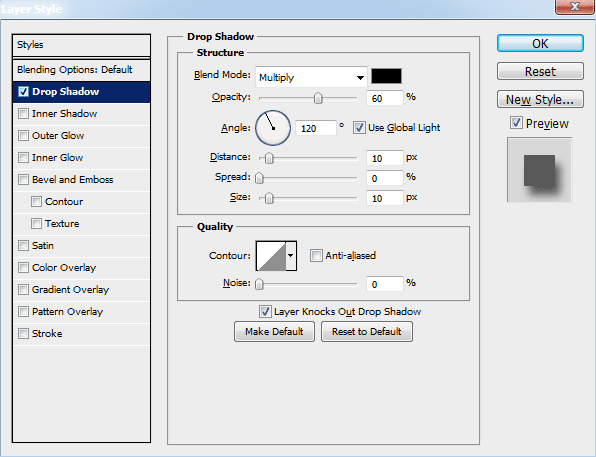
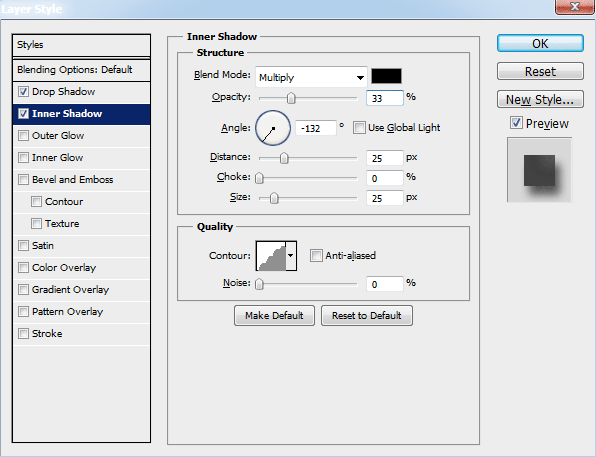
Next we're using going to use two types of internal shadowing: Inner Shadow and Inner glow.
The inner shadow let us simulate the shading of a rounded button edge. Note that the check box is not ticked. This allows the use of a different light angle.
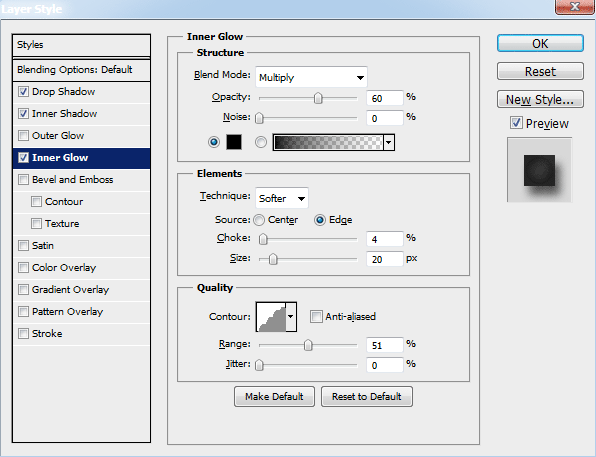
The inner glow settings adds a dark shadow inside all of the button:
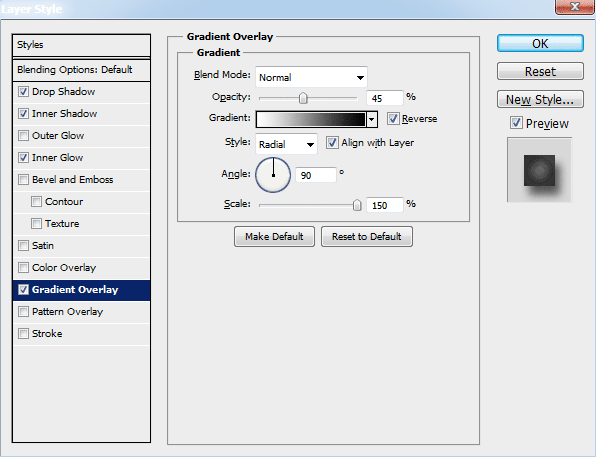
Then, add a subtle gradient overlay to highlight the centre of the badge. The settings shown below uses the Normal blend mode. You may want to experiment with the Overlay and Multiple blend modes for brighter colours on the final button.
Finally, add a bit of Satin. The effect of this style is rather subtle, but in addition to creating a silk or satin look, it will also add additional depth and even more realistic detail to glass and metal effects.
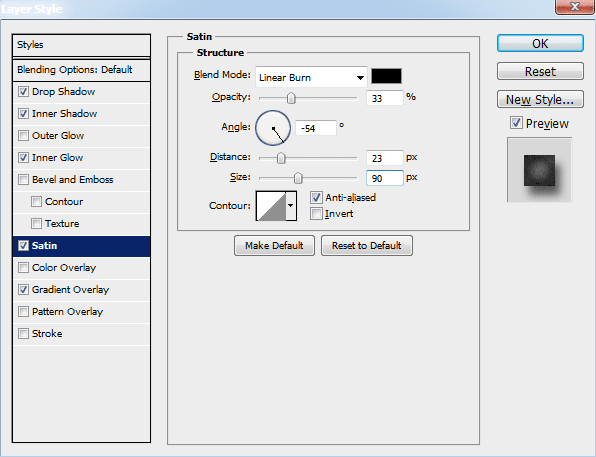
The general idea to try to make the badge look three-dimensional by using shadows at the edges curving away and a radial gradient overlay to make it look like light is hitting the middle.
Create a highlight
Using the circular selection tool, draw an ellipse which is longer horizontally than it is vertically (see screen-dump below).
Create a new layer. Set the foreground colour to white. Select the gradient tool and choose the foreground to transparent gradient. With the gradient tool, draw a radial gradient from white to transparent in the selection. Note that you want to drag the gradient about 30 % beyond the end of the selection, so that total transparency occurs outside of the selection (i.e. the white part has a bit of a sharp cut off when the selection area ends).
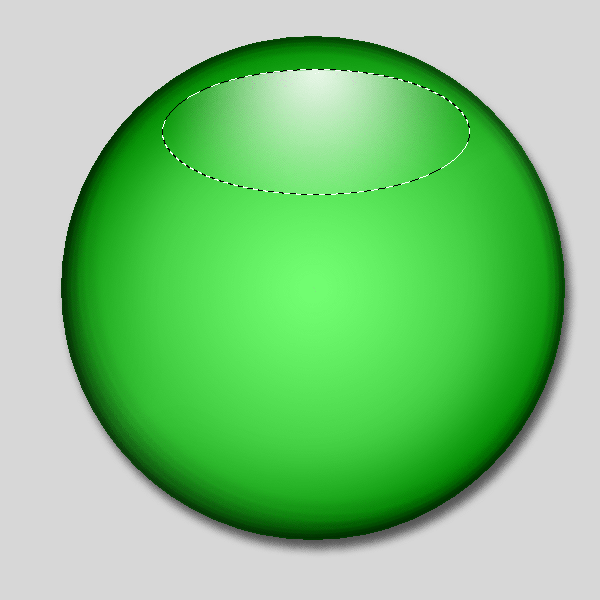
When you're done, rotate the ellipse by about 45 degrees and reposition it at the 1:30 o'clock position. This is the main highlight.
Duplicate the highlight layer and then turn off the visibility for the original highlight layer. Select the highlight copy layer. Select the eraser tool and use a brush with large diameter (1000 px) and 100 % hardness to just leave a small wedge of white near the edge.
Set the opacity of the highlight copy to 60 % and the opacity of the original highlight layer to 50 %.
Duplicate the highlight copy, rotate it 180 degrees and then place it at the 7:30 o'clock position. Reduce the opacity of this layer to 20 %.
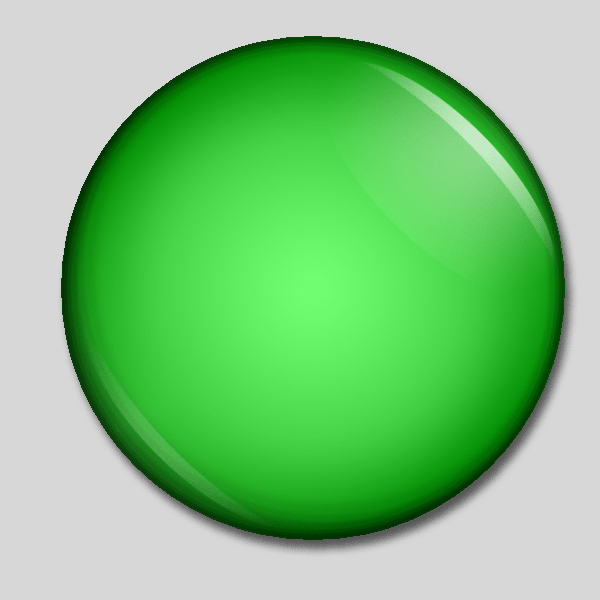
Remove green image
Finally, we want to make the button interchangeable. To do that, go to the green circle layer and set the fill to 0 %. This will remove the green circle.
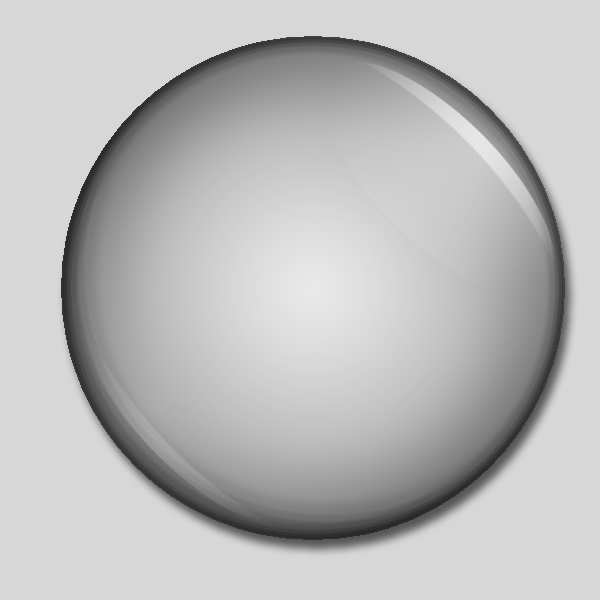
Fill is similar to opacity, except that if one makes the opacity of something 0 %, then one makes all the layer styles transparent too. If one make fill 0 %, the layer styles will still be visible. This means that setting fill to 0 % makes the green circle invisible, but leave all the layer styles needed to make new badges in place.
Save the present version of the badge with all the layers as a
.psd file. You may then retrive this as a template to create
new badges.
Final word
To create an actual badge, load the template .psd file
into PhotoShop. Then find a suitable image and place it in a
layer below the layer style layer. This should combine the image and
the badge teplate.
To clip image to the badge shape, reload the selection of the outside, and delete the part of the image this is outside the badge. You may also apply this selection to remove the grey background, making the area outside the badge transparent.
You round of by merging all visible layers, clipping, and scaling, before
saving the resulting flat file as a .png file.

Above is shown two images where the badge template is combined with an image if the union jack and scaled down. The badge on the left uses the Normal gradient overlay blend mode, the badge on the right uses the Overlay gradient overlay blend mode.
Last update: 2014-01-05 [gh].