Getting your own Drupal website
This short chapter describes get your own Drupal site and how to log in and start using it.
Table of contents
Introduction
A lot of people manage their own Drupal websites. But to install Drupal and maintain it so that it is keeps working and stays secure requires some technical know-how. If you're not a "techie", you may subscribe to a managed Drupal hosting service.
If you're reading this, it is very likely that you alreday subscribe to the managed Drupal hosting service that is provided Hannemyr Nye Medier AS (HNM). The ebook you're currently reading is the "user manual" for this service.
 By
using a managed Drupal hosting service, you can focus on creating
content and curating your Drupal service. HNM will take care of the
technical side of things, including security and functionality
updates.
Creating your administrator account
If you subscribe to HNM's managed Drupal hosting service, you should have received the website's address along with a "secret word" as part of the hosting package. In this ebook, we're going to use "https://example.com" as the website address. The address of your website will of course be something different.
The first thing you need to do is to create an account for the administrator of the website.
When you type in the website's address in the address field of your web browser and hit Enter, you'll be taken to the front page of your website. In the top right corner, there is a link named "Log in". When you click on the link, you're taken to a page that will let you log in with a username and password. However, you can't do that yet. You first have to create an administrator account for your website.
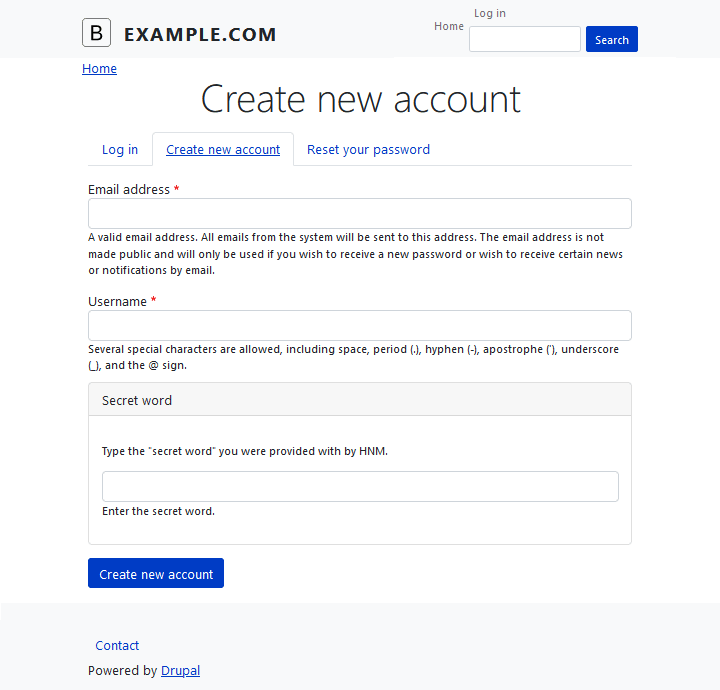
Instead click on the second tab on the page, with the text "Create new account". You'll then see a page where you can enter your email-address and your preferred username, along with the "Secret word" that ensures that only you shall be able to create an administrator account on this website.

 The
little star that appears after "Email sdress" and "Username" indicates that those fields are required.
You shall to be able to submit the form unless those are filled in.
If there is no star, the field is optional.
The actual "Create new account"-page may contain some optional fields that are not shown in figure 2-1
for the sake av simplicity. You may safely leave them empty.
The
little star that appears after "Email sdress" and "Username" indicates that those fields are required.
You shall to be able to submit the form unless those are filled in.
If there is no star, the field is optional.
The actual "Create new account"-page may contain some optional fields that are not shown in figure 2-1
for the sake av simplicity. You may safely leave them empty.
When you click the "Create new account"-button, you'll taken to a new site with the following message:
"A welcome message with further instructions has been sent to your email address."
If you registered an administrator account with the username "Janet", you will shortly afterwards receive an email with the following contents:
Janet,

Thank you for registering at Example.com. You may now log in by clicking this
link or copying and pasting it into your browser:

https://example.com/user/reset/5/1645371036/t5rJbsMnKpEci-2n8ZpZtVJB8jbUF6TX9Vs

This link can only be used once to log in and will lead you to a page where
you can set your password.

After setting your password, you will be able to log in at
https://example.com/user in the future using:

username: Janet
password: Your password

--  Example.com team
When you click on the link in the email, you arrive at page with a button labeled "Log in". When you click on the button, you will be taken to the page where you can set your password.
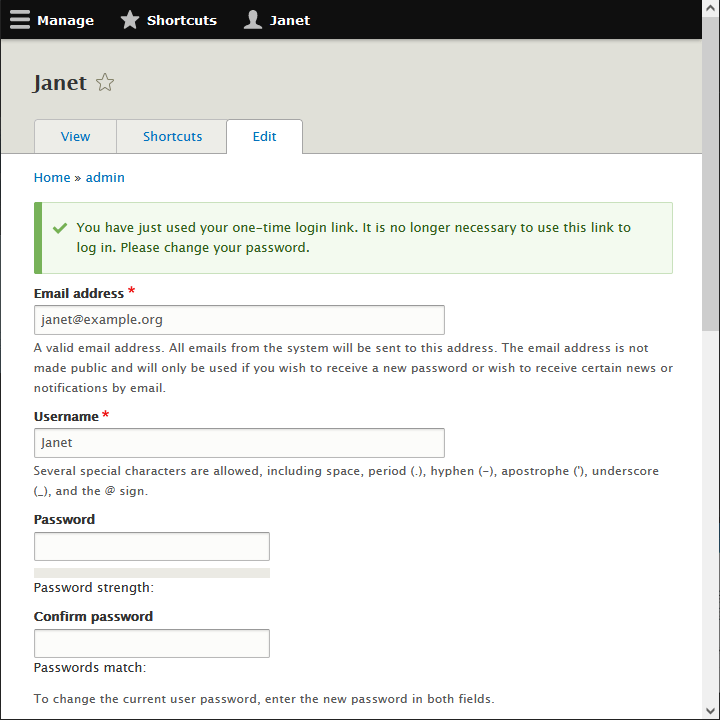
Figure 2-2 shows the top of the page where you can edit your user profile, and set your password.
 It
is important that you set your password before you do anything else on
the site. If you leave without doing it, you shall not be able to log
in again without requesting another one-time login link..

You need to type your password twice. This is to make sure that you misspell it and will not be able to recall it. You will not be able to save the password unless the "Password" and "Confirm password" field are identical.
Make sure you pick a strong password. Instead of a hard to remember pasword with letters, numbers and symbols, consider using a passphrase with four real words. It is easier to remember and more secure, as is explained in figure 2-3.
When done, scroll down to the button of the screen and click "Save". To log in the next time, you can enter your username and the password you just set under the "Log in" tab.
 Password strength is measured in something called "Entrropy".
We shall not go into the mathematical details here, but the higher the entropy, the harder it is for computers to crack the password. The
cartoon below (taken from xkcd website,and used under
CC by-nc 2.5) tells you that instead of using the common strategy of obfuscating a single
short word with caps, numerals, substitions and symbols, you should pick four random common words and use them as your password without obfuscation,
as this will give you a much stronger password.
If don't understand the cartoon, it comes with an explanation.

You're done! Now log out by clicking the "Log out" link in the upper right corner.
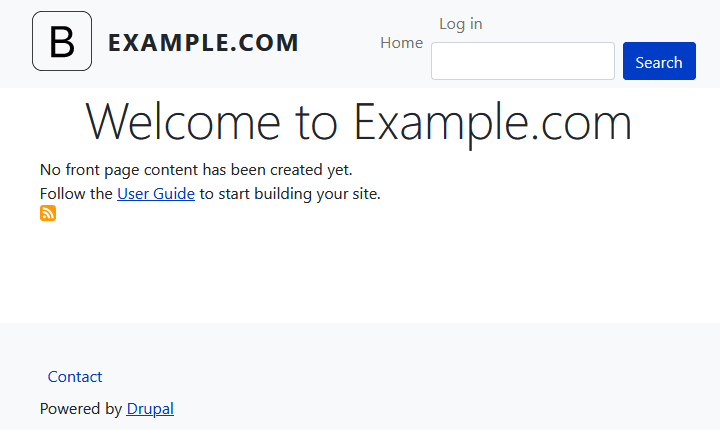
Next time you visit your website's address you will see the main page of your new Drupal site (see figure 2-4). If you want to log in, use shold be able the username and password you created. You log in by clicking on the "Log in"-link in the upper right corner.

Now that you have an administrator account on your very own Drupal website, you can go ahead and create content. Section 2 in this ebook is all about content creation. Until you start creating content, there will a link on the front page to the official Drupal user guide. I recommend that you read it as well. It digs deeper into some topics than this ebook.
 If
you want to look for alternatives to managed hosting, please take a look at HNM's
techical note about Hosting options.
Last update: 2022-02-21 [gh].