Link to an uploaded file
This chapter is a short tutorial showing you how to configure a link field to upload files to your Drupal website. It goes on to explain how to create inline links to it in content, or embed an HTML audio control to an uploaded MP3-file to content.
Table of contents
- Introduction
- Add a file field to the "Article" content type
- Uploading and linking to a file
- Embedding an MP3 sound file
- Final word
Introduction
A much requested feature is for administrators to be able to upload a PDF file to the website and then display a link to the file on the site. Drupal does not provide this out of the box, but it is pretty easy to add this feature without installing any extensions. The trick is to use the file field provided by Drupal's core, and add this field to some content type.
This chapter tells you how to do this, using the built-in "Article" content type as a starting point.
Add a file field to the "Article" content type
You start out by adding the Drupal core file field to the "Article" content type. Below, we spell out all the steps you need to go through to do this:
- Navigate to .
- For the "Article" content type, click "Manage fields". Click "+ Add field".
- In the pulldown menu, select "File". For "Label", you can use whatever you like, but "Attachment" is a common choice.
- Press "Save and continue".
Now you need to configure field settings. We're creating an "Attchment" field for the "Article" content type, but the "Attachment" field may be reused and added to other content types as well. The settings you pick here will apply to the "Attachment" field everywhere it used.
For now, we're going to only change the first setting from its default value.
- "Enable the display field": Check this checkbox. Another checkbox will appear: "Files displayed by default". Check that as well.
- Upload destination: Leave it set to "Public files".
 "Public
files" can be dowloaded by anyone that knows their URL, even if they
do not have access to the page the file is attached to. "Private
files" can only be downloaded by someone that has access to the page
the file is attached to. Leave it at "Public files" for now. You shall
not be able to use private files until you've configured a private
file system, and we're not drilling down into that in this ebook. If
you want to know more, see our technical note about
Working with files in Drupal.
- Allowed number of values. For now, leave it at "Limited" and "1". This will limit the number of attachments to one.
- Press "Save field settings".
The next page are for the settings when the "Attachment" field is used in an article. It initially looks like figure 17-1:
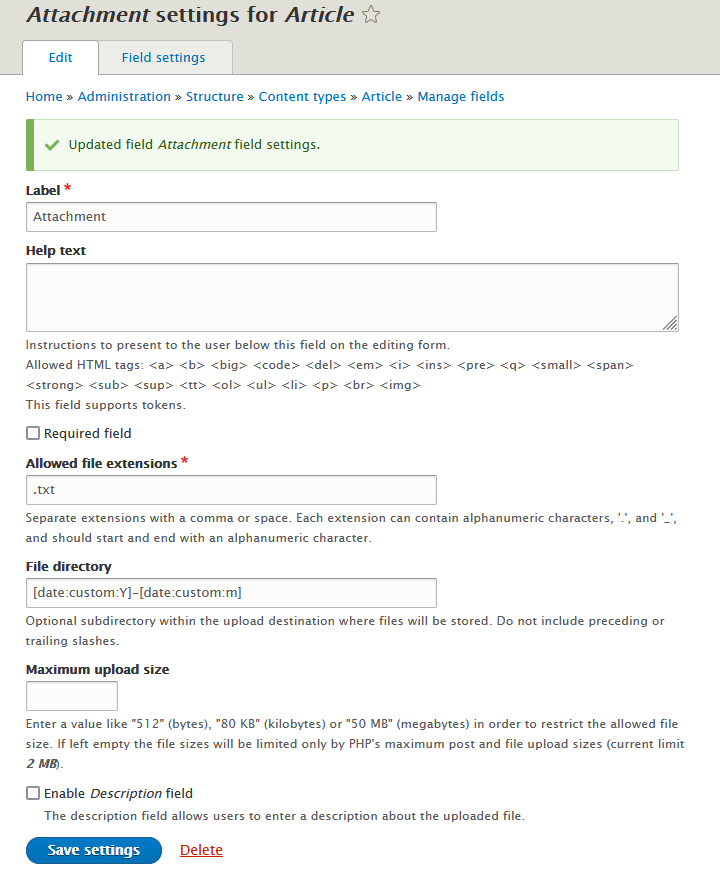
Most of these are self-explanatory, but Ill run through all of them:
- Label: The label shown to the user to identify the field in the content creation form.
- Help text: Text to guide the user about the purpose of the field. You can leave this blank.
- Required field: Check this checkbox to make the field required. Leave blank if you want it to be optional to add a file attachment to the page.
- Allowed file extensions: The default value for this
txt. This means that only plain text files can be linked. You should at least replacetxtwithpdfto allow PDF-files, but I use the following setting:txt, pdf, doc, docx, xls, xlsx, ppt, pttx, mp3. This will allow linking of plain text files, PDFs, MS Office-files, and MP3 sound files. - File directory: This is preset with tokens to make the path to the file contain the year and month. I do not recommend changing this.
- Maximum upload size: The default value is blank, which makes the maximum size limited to the server default (usually 2 MB). If you need more, and subscribe to managed Drupsl hosting by HNM, contact us and ask for this to be changed at the server.
- Enable description field: The default is to use the filename as the link text. If you check this checkbox, the administrator can type in a description that overrides the filename as link text.
When done, click "Save settings".
By default the Article content type only let you attach a single file. To change this, click on the tab "Field settings", and change the allowed of values to "Unlimited" as shown in figure 17-2:
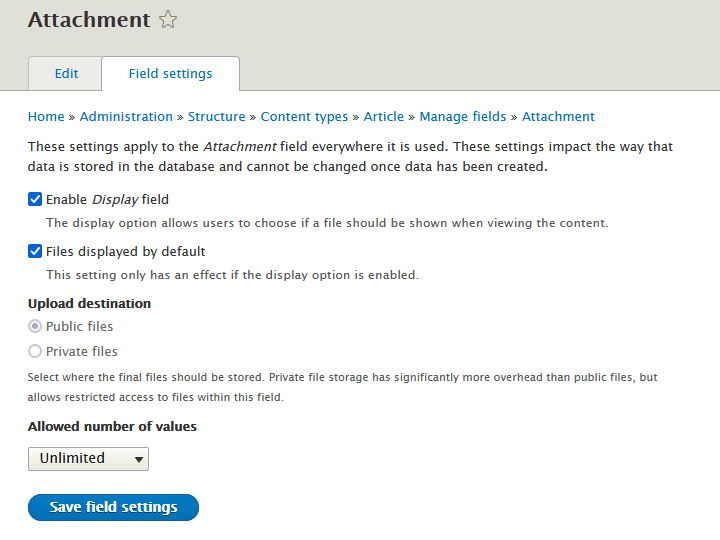
When done, click "Save field settings".
Now, the "Article" content type has a field that let administrators attach files to articles. The next section tells you how to use this field to link to a file.
Uploading and linking to a file
Now, you're all set and ready to go. Go ahead and create a new article as you normally would. Notice than in the form, there is the file field you just added, Labeled "Attachment".

Now, browse your home computer for the PDF-file you want to upload and link to.
After the file has been uploaded, it will appear like this in the "Create Article" form if you may only upload a single file:

If multiple file uploads are allowed the user interface is slightly different, and looks like the screenshot shown below:
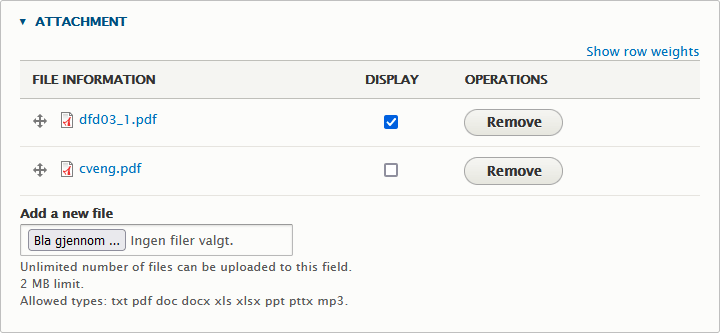
When the "Include file in display"/"DISPLAY" checkbox is checked, a link to the attachment will automatically be displayed below the content of the article.
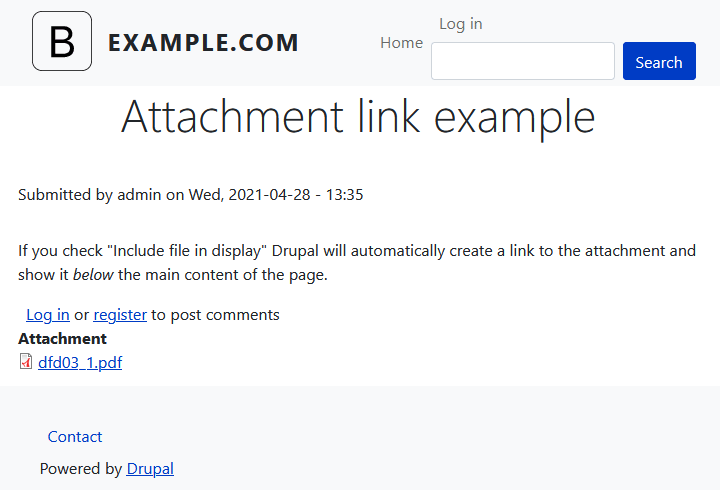
If you uncheck "Include file in display"/"DISPLAY", no such link is created. You will typically do this if you want to create an inline link yourself in some content.
To do this, you first need to copy the link. If you'tr using MS Windows, put the cursor over the link, right-click and select "Copy link". If you're using some other operting system, there probably some other way to do it.
The copied link will look something like this:
https://example.com/sites/default/files/2021-04/example.pdf
Trim away the domain name so you're left with the path to the wile from the webroot. It will look something like this:
/sites/default/files/2021-04/example.pdf
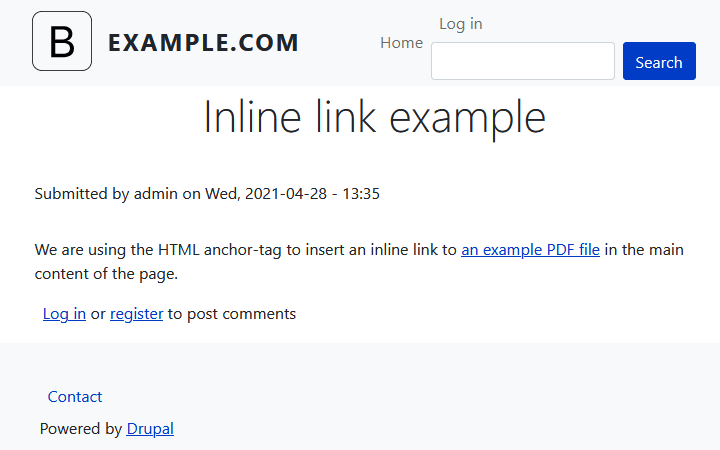
To insert an inline link to the file in content, you need to use HTML markup similar to the example paragraph below:
<p>We are using the  HTML anchor-tag to insert an inline link to
<a href="/sites/default/files/2021-04/example.pdf">an example PDF file</a>
in the main content of the page.</p>
Which will disply like below to people visiting your web page, with the link to the file inline inside the page content.
Embedding an MP3 sound file
To embed an MP3 sound file, start out by uploading the file as described in the previous section.
Make sure the "Include file in display"/"DISPLAY" checkbox is not checked.
Trim away the domain name so you're left with the path to the wile from the webroot. It will look something like this:
/sites/default/files/2021-04/example.mp3
To insert an HTML5 audio control into content, you need to use HTML5 markup similar to the example audio control below:
<audio controls class="embed-responsive-item">
  <source src="/sites/default/files/2021-04/example.mp3" type="audio/mpeg" />
</audio>
To add a preset lower volume, you need to do two things:
- Give the audio control a name using the "id" attribute (in the example below, it is "sound").
- Add a small
<script>to preset the volume.
If you're using the Drupal WYSYWYG editor, its JavaScript will
reformat the the <audio> tag to something like the
markup shown below.
<p>
<audio id="sound" class="embed-responsive-item" controls="">
<source src="/sites/default/files/2021-04/example.mp3" type="audio/mpeg" /></audio>
<script>var audio = document.getElementById("sound"); audio.volume = 0.3; </script>
</p>
It is ugly, but it still works.
If there more than one audio element on the page, each must have an unique "id".
Final word
This chapter just gave you the basics about uploading files and linking to them. Most settings were left at their default. To really learn about the flexibility and power of Drupal's core file field, experiement with settings. For instance, allow unlimited number of file uploads, add description fields, and experiement with the "Manage display" settings for the field (which haven't been mentioned until now).
Last update: 2022-03-31.